My Personal Shopping List - Getting Started
![]()
My Personal Shopping List makes your shopping trips more productive and helps you avoid forgetting to buy something that you need for tonight's special dinner. My Personal Shopping List lets you plan your shopping trips before you leave home, while you can still look in your pantry to make sure you have enough of the things you will be using over the next several days. My Personal Shopping List lets you plan your shopping needs for several different shops at one time so you can maximize your trip and get all the articles you need at one time, instead of running back and forth from your home to different shops. Thereby, saving you time, gasoline, and money.
Download and install the application
Run the application
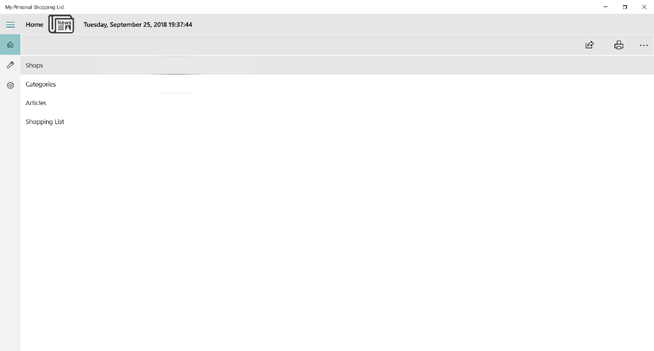
The main screen is displayed
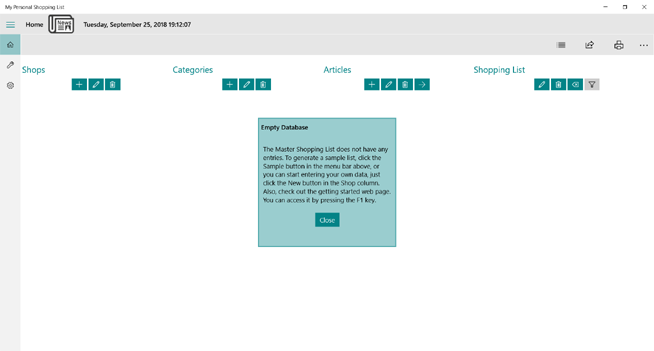
The first time you run the application the data base is empty.
Sample Data Base
You can generate a starter data base by clicking the Sample button in the Menu Bar at the top of the page.
The sample data base contains a limited amount of data. It is intended to help you get started with the program. Alternatively, you can start entering your own data without generating the sample data base. The Sample button is only visible when the master data base is empty.
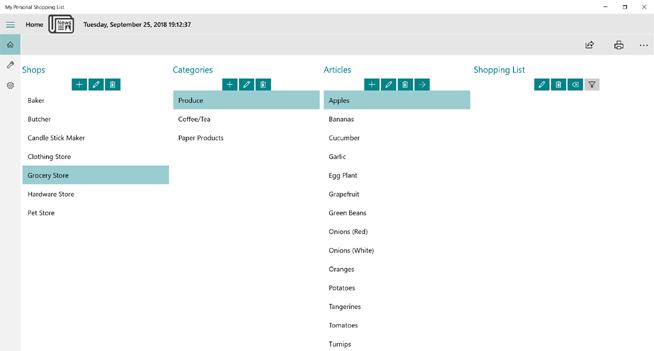
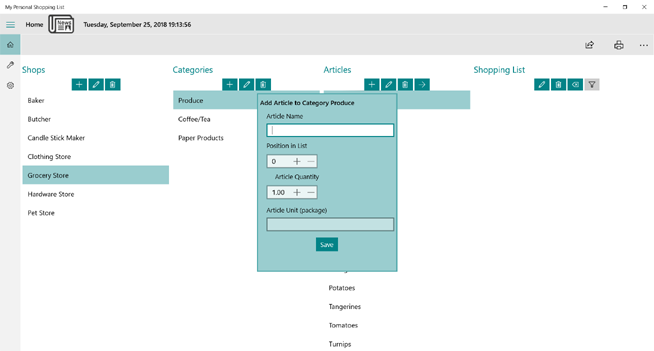
The display is divided into four columns. The three columns on the left are for the master shopping list data. They show the shops where you buy things, the categories (or aisles) within the shops, and the articles found in the categories. The column on the right is the current shopping list. It show the items you wish to purchase from the various shops.
Shops
The sample data base has seven shops, but you can have a many as you need.
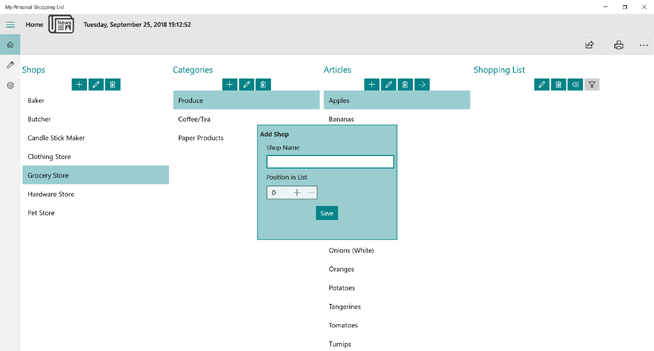
To add a new shop click the New button at the top of the Shops column. A window will open, and you can enter the name of the new shop. The position in list field tells the application where in the display list you want the shop to appear. This allows you to organize your shops in the order you choose. If you want to change the order of the Shops list, you can either edit the Shops entries and change the position number, or you can click and drag a shop to a new position in the list.
Editing a ShopEditing a shop is similar to adding a shop. Select the shop you wish to edit and click the Edit button at the top of the Shops column. A window will open, and you can change the name or position of the shop.
Deleting a ShopTo delete a shop select the Shop and click the Delete button at the top of the Shops column. A window will open asking for confirmation before the shop is deleted. When you delete a shop all of its categories and articles are deleted.
Categories
Categories should be viewed as aisles or sections of a shop. They let you group articles in the same order that you find them in a shop.
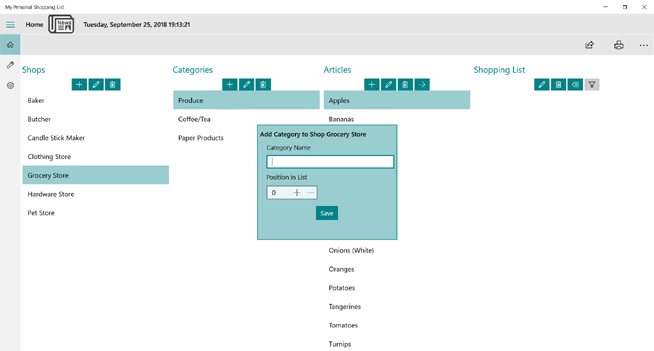
Adding a CategoryTo add a new category click the New button at the top of the Categories column. A window will open, and you can enter the name of the new category. The position in list field tells the application where in the display list you want the category to appear. This allows you to organize your categories in the order you choose; most likely the way the shop is organized. If you want to change the order of the Categories list, you can either edit the Categories entries and change the position number, or you can click and drag a category to a new position in the list.
Editing a CategoryEditing a category is similar to adding a category. Select the category you wish to edit and click the Edit button at the top of the Categories column. A window will open, and you can change the name or position of the category.
Deleting a CategoryTo delete a category select the category and click the Delete button at the top of the Categories column. A window will open asking for confirmation before the category is deleted. When you delete a category all of its articles are deleted.
Copy a Category to Another ShopSometimes two or more shops can have the same categories. For example, if you use two grocery stores, then there is a good change that both of them have a meat section. If you have the meat category already defined on one of the shops, then you can just click and drag it to the other shop. The category, along with its articles will be copied to the target shop.
Articles
Articles are the items that you purchase in a shop.
Adding an ArticleTo add a new article click the New button at the top of the Articles column. A window will open, and you can enter the name of the new article. The position in list field tells the application where in the display list you want the article to appear. This allows you to organize your articles in the order you choose; most likely the way the shop is organized. The article quantity field lets you specify the quantity to added to the shopping list when you add this article to the shopping list. For example, if you normally buy two bottles of milk when you go shopping, you could change this number to two. Then if someone else goes shopping for you, they would know that you want two bottles of milk; not just one. The article unit field allows you to describe the package type for the article. For example, for ground meat you could enter lbs for pounds. The article unit field is not required, so you can leave it blank if you wish. If you want to change the order of the Articles list, you can either edit the Articles entries and change the position number, or you can click and drag an article to a new position in the list.
Editing an ArticleEditing an article is similar to adding an article. Select the article you wish to edit and click the Edit button at the top of the Articles column. A window will open, and you can change the name or position of the article.
Deleting an ArticleTo delete an article select the article and click the Delete button at the top of the Articles column. A window will open asking for confirmation before the article is deleted.
Moving Articles
If a store moves an Article from one aisle to another, you can easily move the article in the data base so that it shows up in the new category. For example, let's say that in a grocery store garbage bags have been on the same aisle as paper products, but the grocery store decides to move them to the aisle with cleaning supplies. You can click the article garbage bags and drag it to the category for cleaning supplies. The application will move the article, saving you the trouble of having to delete it from the old category and re-enter it in the new category.
Add an Article to the Shopping ListYou can add an article to your shopping list in several ways. You can select the article in the Master Shopping List and click the Add To Shopping List button at the top of the articles column, you can double click the article in the articles column, or you can click and drag the article from the articles column into the shopping list column.
The Shopping List
You can remove an article from your shopping list in several ways. You can select the article in the Shopping List and click the Delete button at the top of the shopping list column, you can double click the article in the shopping list column, or you can click and drag the article from the shopping list column to the delete button at the top of the shopping list column. To remove all articles from the shopping list, click the Clear Shopping List button at the top of the shopping list column.
Filter the Shopping ListYou may not want to see (or print) all of the shops in your shopping list at one time. If you are going to the grocery store you may want to see just that store on you smart phone (or your printed shopping list). You can hide the other shops by filtering the shopping list. Click the filter button an the top of the shopping list column and select just the shops you wish to see at this time.
Print the Shopping ListTo print your shopping list, click the Print button in the menu bar at the top of the screen.
Screen Management
Different devices have differnt sizes of display screens. My Personal Shopping List will adjust the width of the columns to try to fit them on the screen. However, smaller devices such as smart phones and some tablets just do not have enough display room to show all of data in a readable fashion. So on these devices you can see just some of the data at any time. To compensate for this, My Personal Shopping List allows you to scroll the screen from right to left.
You can scroll with your mouse, or on touch screen devices drag the screen with you finger, or you can click the column header of one of the columns and select the column you wish to see from the selection list that is presented. In most cases you will be able to see data from more than one column.
Utilities
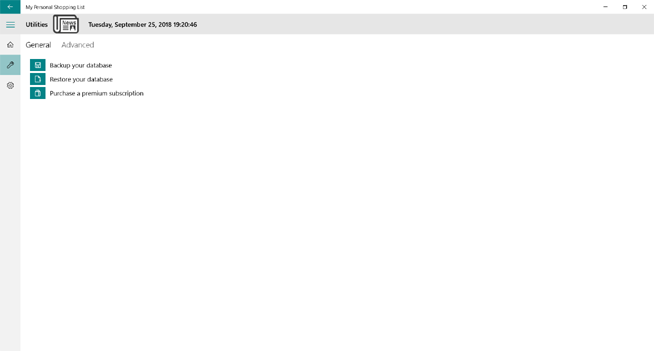
The Utilites screen allows you to perform certain functions concerning My Personal Shopping List. You can backup your data base, which we recommend you do after making changes to your master shopping list. You can restore your data base from a backup should something happen on your PC and your shopping list data is load, and you can purchase a premium subscription for My Personal Shopping List.
Settings
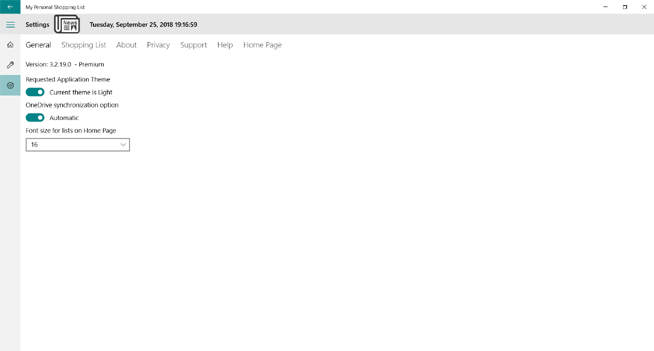
General settings allow you to control certain features of My Personal Shopping List.
Requested Application Theme: Allows you to choose between Windows light and dark themes.
OneDrive synchronization option: This feature only applies the the premium version of My Personal Shopping List. With the premium version, you can share your shopping list with multiple Windows devices. For example, your PC, your tablet, and your Windows phone. Data sharing can be done two different ways: Manually, where you click a button on the Home Screen whenever you wish to share your data, or Automatically, where the application will check OneDrive for a new version of the data when the application starts or resumes and download it, and it will upload your data to OneDrive when you exit the application the application suspends.
Font size for lists on home page: Allows you to set the font size for the information in the lists on the home page.
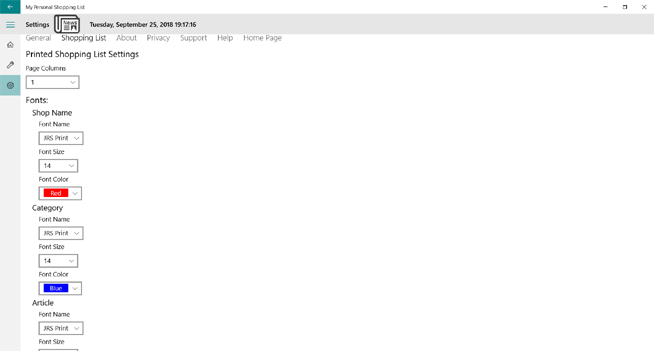
Printed Shopping List Settings allow you to tell the application how many columns you wish the printed page to have when you print your shopping list. You can choose between in the range between one and four. In addition, you can control the font name, font color, and font size to be used when printing a shopping list. You can specify different settings for the shops, categories, and articles.