My Cookbook - Getting Started
![]()
My Cookbook is a recipe management system. You can organize your recipes, plan your meals, and create a shopping list for the items you need to prepare your meals all in one application.
Quickly enter your recipes and organize them to suit your needs. My Cookbook supports multiple cookbooks, so you can group your recipes by type of food, county, or many other possible groupings. For example, you can have on cookbook for Mexican food and another cookbook for French recipes. Within each cookbook you can specify what course this recipe is for. For example, breakfast, lunch, main course, cocktail, etc., and you can specify the name of the courses. You can also categorize the recipe according to type of food, such as beef, chicken, fish, bread, etc.
You can import recipes from a number of popular recipe web-sites.
You can plan your meals for the week with the meal planner.
You can add the ingredients for a recipe to your shopping list with a single click of a button while viewing the recipe. You can tailor your shopping list to add additional items or remove items before making you trip to the store.
Download and install the application
Run the application
The home page is displayed
The first time you run My Cookbook a cookbook is created, and a few recipes are added as starters.
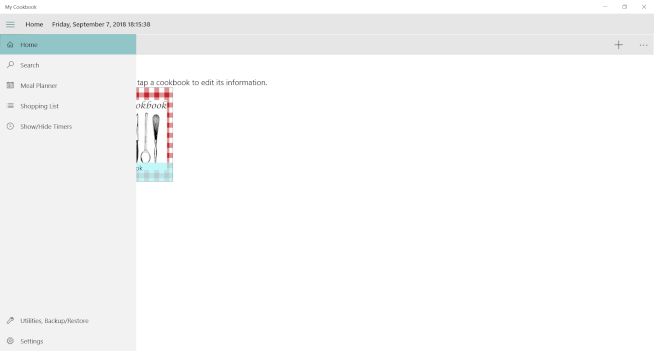
The navigation bar on the left side of the screen allows you to move to the different functions in the program. You can expand the navigation bar to display a textual description of the functions by clicking the ‘hamburger’ button () located at the top of the navigation bar. To close the expanded view of the navigation bar, click the ‘hamburger’ button again.
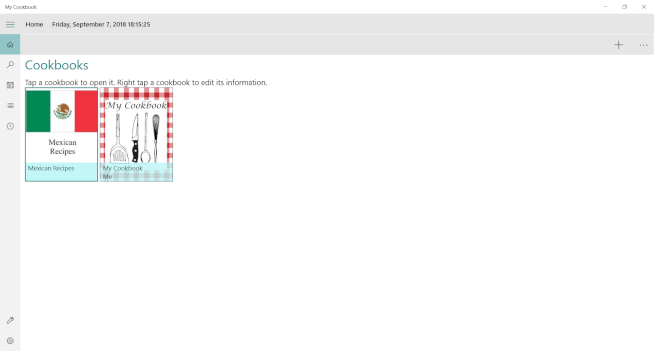
Add New Cookbook
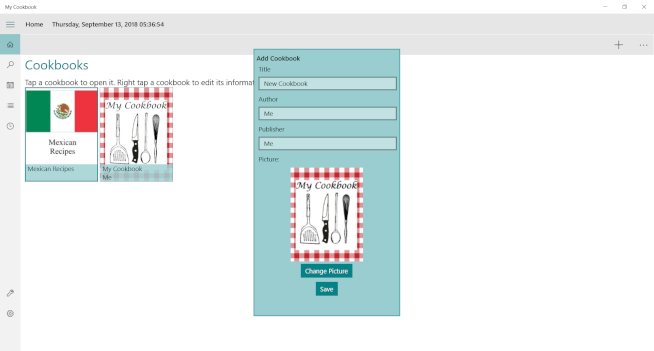
To add a new cookbook, click the Add New Cookbook button () in the command bar located at the top of the screen.
A window will open, and you can enter the cookbook’s name. Optionally, you can enter the author and publisher, if appropriate, and you can select a picture for the cookbook.
To open a cookbook, click on the picture, or to edit the cookbook’s name and other information, right click on the picture (for touch screen devices, tap the picture and hold for a second or two).
Recipes
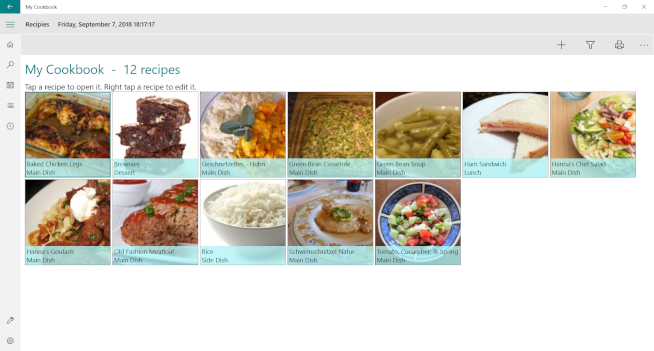
The Recipes page shows you the recipes in the selected cookbook.
To display a recipe, click on the recipe’s picture. The command bar located at the top of the screen provides three additional functions: Add New Recipe (), Filter Recipes (), and Print Recipes ().
Display Recipe
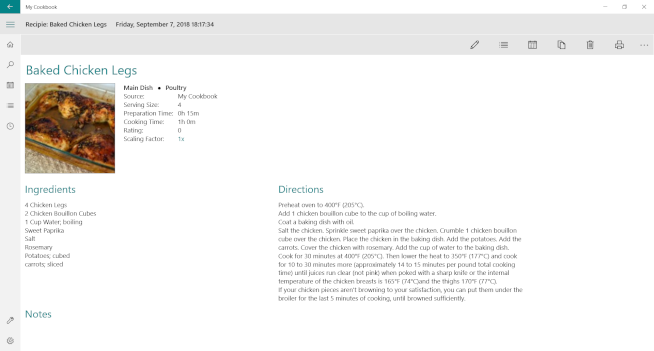
To display a recipe, click on the recipe’s picture, and the recipe will open.
On this page you can edit the recipe (), add the recipe’s ingredients to your shopping list (), add the recipe to your meal planner (), copy the recipe to another cookbook (), delete the recipe (), or print the recipe ().
Add New Recipe
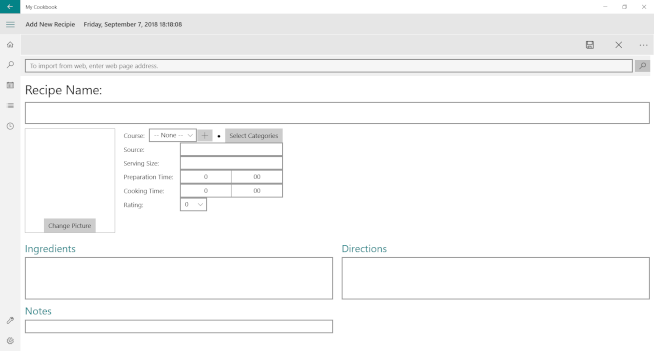
The Add New Recipe screen allows you to enter the information for your recipe. You can provide as much or as little information as you desire. In addition, My Cookbook can import recipes from many popular recipe web-sites. To import a recipe, enter the web-page address of the recipe in the search line located at the top of the page and click the search button (). If the application supports the site, the available information will be filled in. To save the recipe, click the save button () located in the command bar. To cancel and not save the recipe, click the cancel button (). If you have a favorite site that is not supported, please email the site information to support@stembridge.org, and we will try to add it in a future release.
Filter Recipes
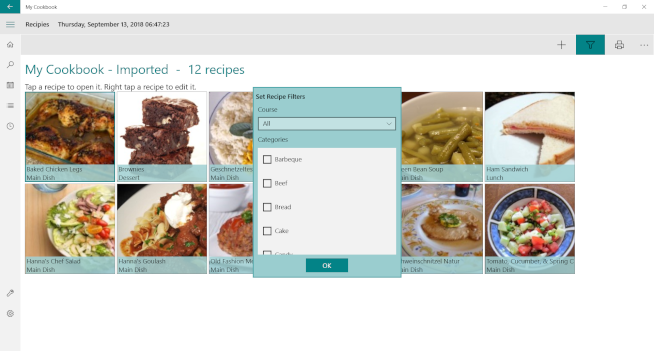
When you click the Filter Recipes button on the Recipes Page, a window will open and you can enter your filter criteria. You can filter the recipes displayed by course or category.
Print Recipes
You can print your recipes by clicking the print button () located in the command bar. On the individual recipe display page, it will print the recipe you are viewing. On the recipes page, it will print all recipes shown on the screen (this is a premium feature and will not work in the standard version).
Edit Recipes
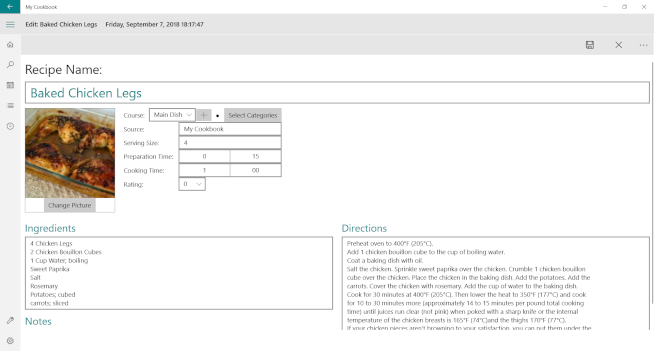
You can edit a recipe by clicking the edit button (). Optionally, on the Recipes screen you can right click the picture of the recipe you wish to edit. The recipe edit screen will open, and you can change the information for the recipe. To save the changes, click the save button () located in the command bar. To cancel and not save the changes, click the cancel button ().
Add Ingredients to Shopping List
You can add the ingredients for a recipe to your shopping list by clicking the add to shopping list button () located in the command bar of the display recipe page.
Add to Meal Planner
You can add the displayed recipe to your meal planner by clicking the add to meal planner button () located in the command bar.
Copy Recipe to Another Book
You can copy the displayed recipe to another cookbook by clicking the copy to another book button () located in the command bar.
Delete Recipe
You can delete the displayed recipe by clicking the delete button (
Search
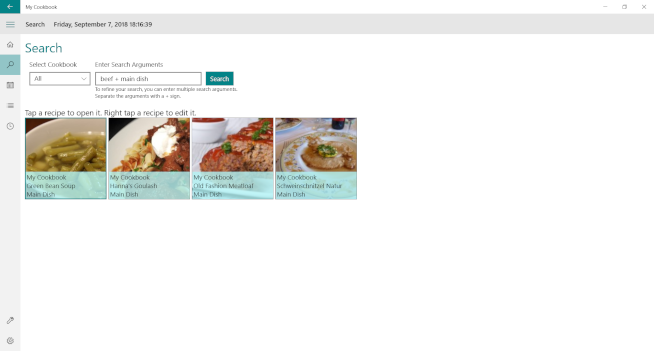
You can search for a recipe using keywords that describe the recipe. The search can be across all cookbooks, or you can limit it to one cookbook. Enter your search arguments and click the search button. The results will be shown on the screen. You can click a recipe to open it.
Meal Planner
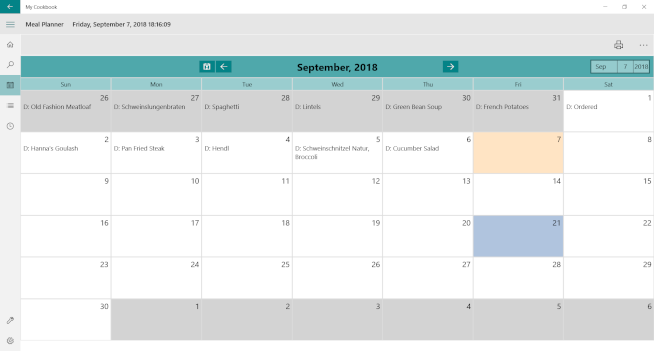
The meal planner allows you to plan you meals ahead of time; relieving the stress of trying to decide what to cook at the last minute. It is also a reference of what you have eaten recently, helping you prevent repeating the same meal too often. To add a meal, simply click on a date; a window will open that allows you to enter the meal you plan to cook. You can also add a recipe to the meal planner from the recipe display page.
Shopping List
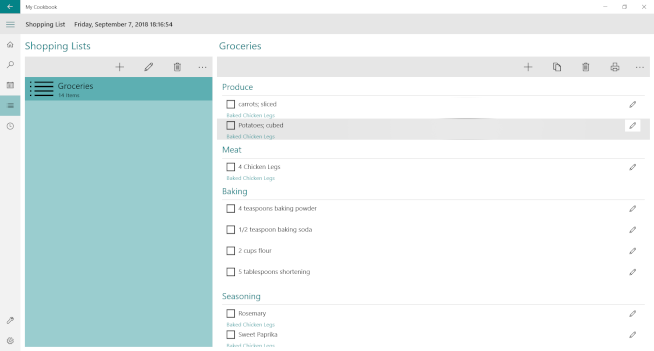
A shopping list makes your shopping trips more productive and helps you avoid forgetting to buy something that you need for a meal. The Shopping List lets you plan your shopping trips before you leave home, while you can still look in your pantry to make sure you have enough of the things you will need. You can plan your shopping needs for several different shops at one time so you can maximize your trip and get all the articles you need in one outing, instead of running back and forth from your home to different shops. Thereby, saving you time, gasoline, and money. You can change the order of the categories and items on the Settings page. Your shopping list will sync with your Windows 10 phone, so you will have it handy when you go to the store (syncing is a premium feature and will not work on the standard version).
Timers
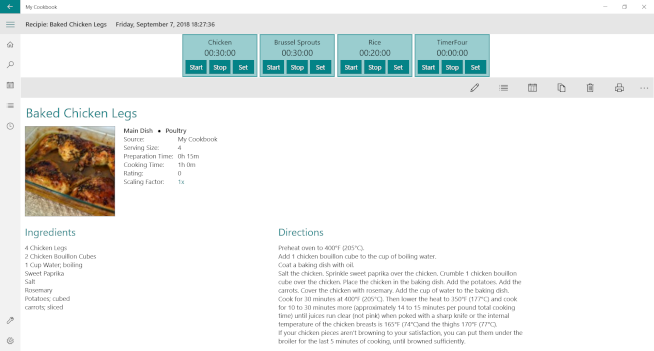
My Cookbook provides four timers to help you when you are cooking your meal. To display the timers, click the Show/Hide Timers button () in the navigation bar. The timers will continue running if you hide them. The timers will sound an alarm when they reach zero.
Set Timers
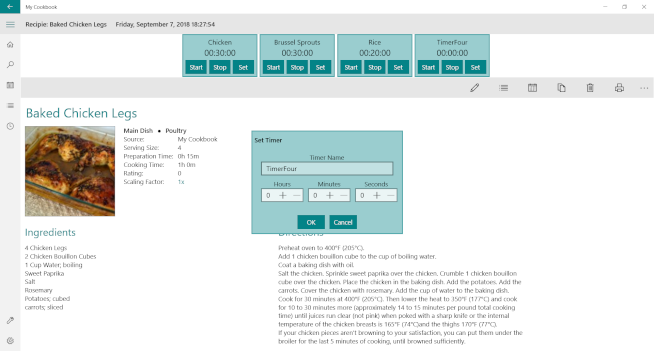
When you click the set button on one of the timers, a window will open, and you can tell the application how long this timer should run. You can name the timer to help you keep track of the different items you are cooking.
Utilities
The utilities page allows you to make backup copies of and restore your database.
Settings
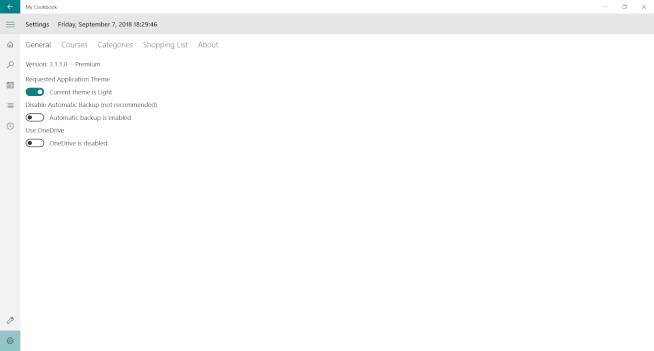
The Settings Page allows you to control some of the features of My Cookbook. It is divided into several categories: General, Courses, Categories, Shopping List, and About.
General Settings
Requested Application Theme: You can set the display theme to light or dark
Disable Automatic Backup: The application attempts to automatically make a backup copy of your database once every day you run the application. This is to make recovery easier should your PC encounter a problem. The backup files are kept one your OneDrive in a folder named My Cookbook. A minimum of seven backups for a minimum of 14 days is kept. Older backups are automatically deleted. An internet connection, and access to your OneDrive are required for this feature to work.
Use OneDrive: This instructs the application to use your OneDrive to share your database across your different Windows 10 devices (this is a premium feature and will not work on a standard license).
Courses
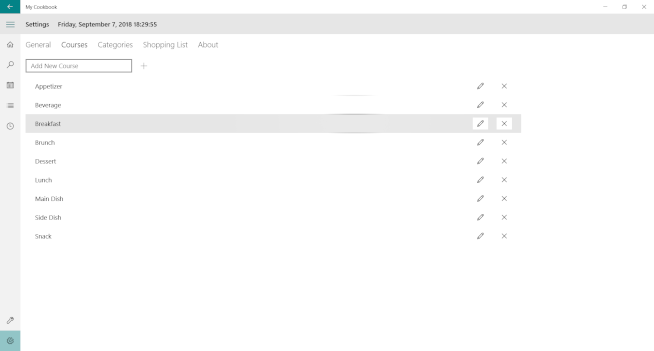
Here you can manage the courses your cookbook uses. You can add, delete, and edit a course.
Categories
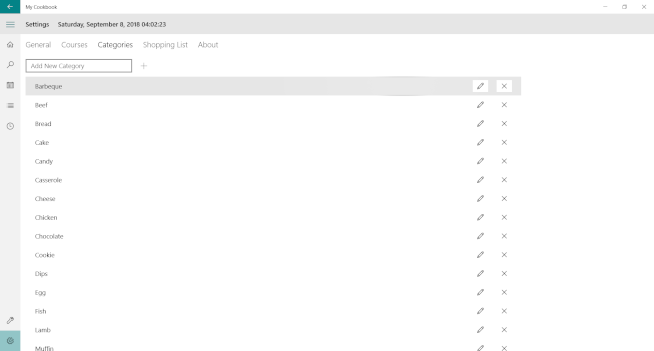
Here you can manage the categories your cookbook uses. You can add, delete, and edit a category.
Shopping List

Here you can manage the categories and items the application uses for you shopping list. You can add, delete, and edit the shopping list categories and items. In addition, you can change the order the categories and items appear on your shopping list by click and dragging the categories and items to a new position.